If we want to change our world, it starts with U – Know your WHY – Start with WHY do I get out of bed – The HOW will happen – Focuses on WHAT U have to do to reach your WHY. U know your dreams – Peace EzE
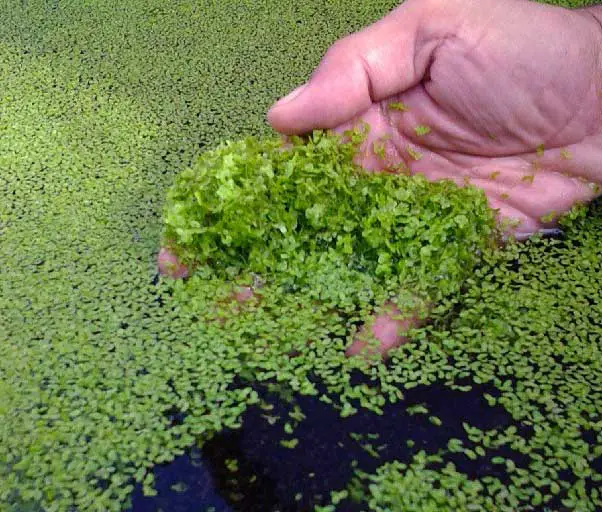
Simply Aquaponics is a combination of aquaculture with fish and other
animals. Which allow us to reuse the assets like water, fish feed and
other disposable elements generated or introduced in a farming
environment. There are a lot of advantages like reusing assets and
disadvantages of this method such as Multiple points of failure and
unsecured success. Let’s learn about Aquaponics description & how it
works in the next topics.
What is Aquaponics?
Aquaponics definition: Aquaponics
is a relevant form of culture for the production of culture and fish in
a symbiotic relationship. This is the easiest explanation for it. Now,
the term aquaponics appears from the combination of two other terms.
The
first is aquaculture, which is the breeding of aquatic animals. The
second is hydroponics, which is the cultivation of plants in water. From
the conjunction of both technologies derives the aquaponics.
How does aquaponics works?
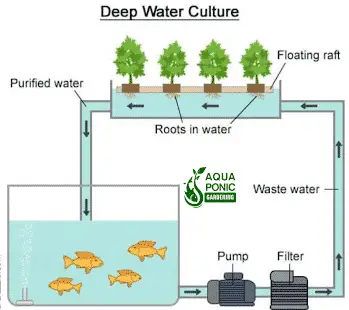
From the description of aquaponics, we know that, It aims to the combined and sustainable production of plants and animals. The basic idea
behind aquaponics can explain in a simple way. Fish waste serves as
fertilizer for plants. Otherwise, the toxicity of the water would impede
the development of aquatic animals. Due to the fact, it is a closed
system. Let’s understand the picture below!
aquaponics working procedureExample:
Imagine a home aquaponics, which is a closed system. There are
fishes in the lower components. On the top, there is a garden. In the
garden, there will be some plants as well as bacteria. As we know where
there is a leaving thing there will be bacteria. Both two different
kinds supply food to each other.
Fish eat food, which you provide and produce waste.
A water pump carries water with fish feed waste to the garden.
In the garden, bacteria living on the hydroton pebbles. They convert that waste (ammonia+nitrites) to fertilizer (nitrates).
The plants feed on nitrates & purify the water.
Clean water siphons back to fishes.
Important notes:
In
order to practice, it does not require to install a garden on top of
the fish container. We describe that in that ways that you can
understand the basis of this process. That is the water is recycled time
to time. Wastewater of fish container is purified in the garden. Plant
in the garden takes the fish feed waste as fertilizer after they become
manipulated by helpful bacteria.
So if you can ensure the water flow between garden-fish container it becomes an aquaponics.
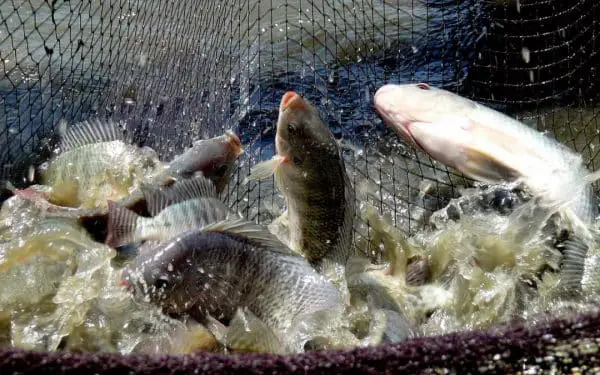
Advantages of aquaponics
Aquaponics
considered a sustainable production system. It presents a series of
beneficial features for the environment. Some of the advantages are the
following:
Land Conservation
Aquaponics
system produces 2-6 times because it allows us to use multiple
platforms on top of each other. No matter where and what condition you
are it you can cultivate different crops in same area.
Efficient use of water and nutrients
In
aquaponic systems, water is a well-used resource. It is the means of
life of the fish and the roots of the plants. That is water used twice
better yet. The nitrified water from the fish waste the plants cleaned
to a certain extent. In this way, the soil does not salinize in case of
having to empty it.
Organic fertilization
Fish
waste is a nutrient-rich fertilizer for plants. In this way, it is
possible to reduce considerably the expense of fertilizer salts. Better
still, some of the certifications to organic products can overcome. If
an adequate management of the aquaponic system is carried out.
Produce the highest yield on a field
You
probably know from aquaponics description that it can use the same land
for production agriculture and fishes. That means it can provide the
highest yield on your land.
No floor is required
In
many places, the quality of the soil is poor. That prevents the
harvesting of good quality products. Aquaponics represents an
interesting alternative for areas. That is with soil problems and for
desert areas. It is also a system could be of great interest to
cultivate in cities. The somewhere arable land is practically
non-existent.
Environmental Benefits
Aquaponics
uses 90% less water than conventional agriculture. Being a closed
system it does not waste river water due to use of harmful fertilizer.
This is more environment-friendly then organic farming. Because it does
not allow us to practice any harmful farming.
Closeness to the markets
An
aquaponic system can be installed almost anywhere. It is including food
distribution centers and markets. In this way, it would be possible to
reduce expenses for transport concepts. It would have fresher and better
quality products. It could be without avoiding post-harvest damage
during transport.
Disadvantages of aquaponics
Like
any productive system, aquaponics also has certain disadvantages. The
magnitude of these depends a lot on the care. That gives to each detail
some may be:
Unsecured success
We
know that no productive system has a perfect success rate. In the case
of aquaponics, the percentage is quite small. The point is that many
systems are largely standardized. On hydroponics, for example, there is
much information about it. With aquaponics is not the same, much
research and standardization are lacking.
Multiple points of failure
Aquaponics
is relatively more complex than other production systems. Due to the
fact, you have to be aware of both plants and animals. This implies that
the points where the system can fail are more. On the one hand, the
fish can die if they do not have the right conditions. On the other
hands, the plants are susceptible to pathogens.
Unsustainable fish food
The
cost of food for the fish can make the system economically
unsustainable. It is important to ensure the supply of such food at an
appropriate price. At a certain moment, once the system is installed. It
could become the most expensive factor in the entire system. Special
attention has to pay.
The initial cost to set up the aquaponics:
Starting
an aquaponics project has a relatively higher initial cost than other
production methods, such as home gardens. However, it is not possible to
give a real figure. It will depend on the size of the system and its
technological level. Consider that pumps and plumbing items are
required.
These Documents contain information gathered from many Online
Communities and all possible references have been given to the authors
of each individual article.
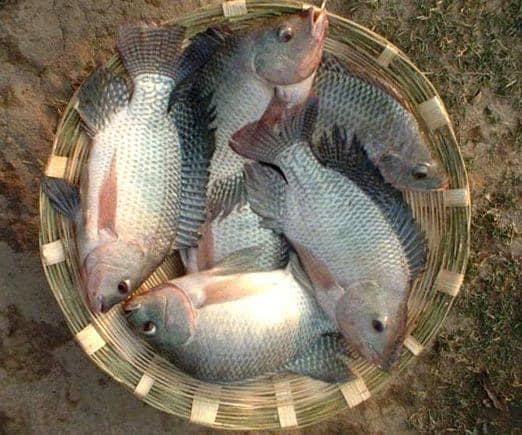
A Guide to Grow Tilapia Fish for Starting a Small Scale Business [A-Z]
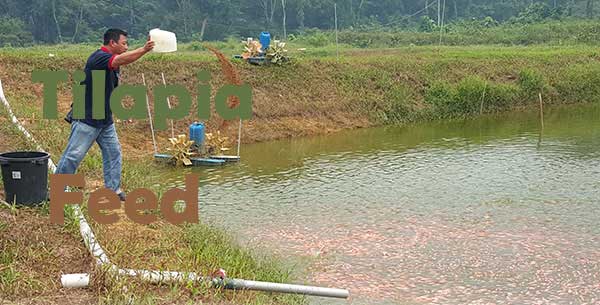
How to start tilapia fish farm:
To
begin with, it is necessary to have an adequate design of the ponds or
tanks. This allows the efficient management of water. In this farm,
there should be drainage for harvesting and maintenance of the fish
container. The quality of the feed will allow the fish culture to grow
well.
The culture of tilapia is currently very profitable farming business.
There are two types of breeding that are the most important: intensive
and hyperactive intensive. We discuss the whole process below.
How to start tilapia fish farm
Best tilapia species:
Tilapia
can be discovered in lakes, ponds, marine habitats, water courses,
estuaries, and seafaring conditions. They favor tropic conditions with
water temperatures in the 25-30 ºC range. Some varieties can tolerate
cold colds down to 8 or 9 ºC.
Name
Short Description
Reason/ Whether
Nile Tilapia
The ancient species from Egypt. After five to seven months at approximately 1-2 pounds.
Anywhere,Water type: Fresh lake water.
Blue Tilapia
Gain 2-4 pounds in a year.
Northern Africa and the Middle East, USA, Part of Asia. Grow in cold temperature alsoWater: Fresh and Saltwater
Mozambique Tilapia
Can reach over 2 pounds in a year.
Can’t grow in cold or salty water.
Andersonii
The best-tasting species with a small head.
Suitable for cool-water culture.
“Abbassa’ and ‘Akosomb’
Hybrid from Nile Tilapia
Grow 30% faster.
Rendalli
Largely herbivorous
Attractive for the aquaponics industry.
Monosex Tilapia
Hybrid. Grow very first in the pond for twice a year.
India, Bangladesh, South Africa, USA
Everything you need to know to grow tilapia [Guide]:
Everything you need to know to grow tilapiaThe
basic and advanced things you need to know before starting to
harvesting is pointed down. Learning about this will help you to be a
successful tilapia fish farmer. We try to discuss all the materials you
will need to acknowledge. Let’s start…
Where to Grow tilapia fish?
Grow
tilapia fish possible in a variety of conditions, including fish ponds,
cages, raceways, and tanks. Residential producers have even started
growing them in trash cans.
But if you like to grow tilapia fish
for profit you need set of ponds or tanks. Depending on your budget it
could vary from 8 to 12 tanks or even more.
How fast tilapia grows:
It
takes about eight months which is thirty-two to thirty-four weeks to
reach 450-600 grams. Though, the organic farming depends on many factors
like food, weather, and care.
How to secure the profit:
In
order to secure the profit firstly, you have to understand the problems
related to this farming methods. This is so important for starting up a
successful commercial farming. In fact, we have some issues on our
farm.
So we decide to talk other successful tilapia fish farmers. As Soon, The modern farmer’s blog reaches to those farmers they help us to write the best tilapia fish farming article. The common causes of failures are:-
To much fingerlings:
The tilapia fish is very productive in terms of breathing new baby
fish. Which create an unwanted situation. The female spawn about
200-1000 eggs after every 4-6 weeks. Do you afford that? to feed or
grow?
There is a solution of this- Mono sex Tilapia Farming Method. Which allow us to farm only male tilapias.
Lack of nutrition: Generally people do not have the proper knowledge of age-based nutritious. We will give you the proper guideline on that.
Sell related Problems: Again
this is a very commonly done mistake that most of the farmer
misunderstood. As with any other fish, the tilapia fish have a quick
growth stage and slow growth stages.
Let’s think that,
You
have some fish in your pond. Now they will require foods and spices. If
they don’t grow weight any time soon. But you are feeding them. As they
are not growing weights your foods are being wasted. So what can you do? Read Catching / Harvesting [ How & When].
Ensure the quality of Water and nutrients:
Water
is one of the most important things. As you know tilapia can survive in
dirty water. You don’t want to produce poisonous fish in your firm.
Bacteria, viruses, pathogens and other infectious organisms are harmful
to human body. So it will be wise to provide fresh water to your pond or
tanks. What’s about nutrients:
General Food Cart for Tilapia. Divide the total amount of food needed with serving time. Make sure you don’t waste any feed.
Assumed-size of fish
Amount of Feed per day /per fish
Approximate Time after stoking
Times a Day
5-40 g
1g
1-2 month
3-4
40-100g
2-3g
2-3 month
3-4
100-400g
3-4 g/fish
3-5 month
3
400+
4-5 g/fish
5 months +
3
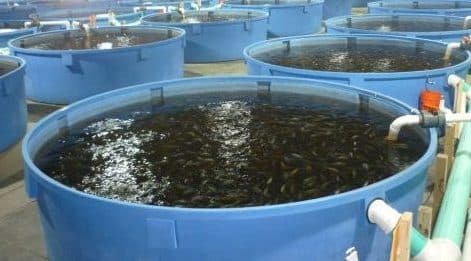
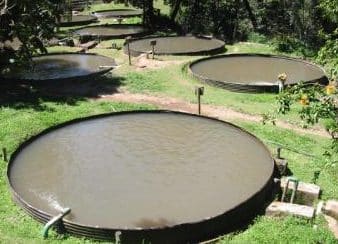
Tilapia pond design [Make circular Container]:
tilapia fish pondIn an ideal farm model,you require eight
circular ponds/ tank. In the cultivation systems, there are two types
of aeration. These are vertical and the horizontal. The first vertical
creation goes from the bottom to the surface. This type of aeration
gives us by an apparatus. That is aquaculture called blower. This system
used in the first stages of cultivation.
Since you see the fish
until they weigh 45 grams. So,this stage can store 180 to 200 tilapia
fishes per cubic meter of water. And, It is representing 14 to 16
thousand tilapia fishes per pound. This weight he will require two
additional tanks to the first one. In the second stage, between 85 and
100 animals handled per cubic meter. This is where the horizontal aeration type is required. Note: Circular tank pond is recommended, not essential.
Divide the container for better production:
For the commercial cultivation, this is essential to ensure the fastest growth of tilapia. If you have eight containers, with four them,
you could have a constant, uninterrupted production. So you can be
steering profits approximately every month. So start with the half of
pond/tank then another month start another half in another and so on. If
you tried to increase the number of ponds, Still, it is in multiples of
four.
In tilapia, farming system, the fish depends entirely on feed.
In this system, you do not need external aeration systems. Only an
efficient water exchange when required. A very important point is that
in any of the two farming systems. It is very important to have a monosexual tilapia.
Therefore, there is an unwanted reproduction. Since the tilapia is very
early and after two months. They begin to reproduce and could leave the
producer far from profitability.
Standard tilapia fish tank/ pond size:
Now,
in a pond should be of 20 by 40 meters. The standard size is 800 square
meters. The depth that we are going to have is 1 meter 20 centimeters.
It represents 960 cubic meters of water.
But:
If we handled 10
tilapia per cubic meter, 9600 fish would be stored in this pond. The
most important when growing tilapia fish is the balanced feed. It
estimated that 1.7 kilograms of food would give to harvest a kilogram of
meat. It is important to know the ideal weight of harvested tilapia is
500-600 grams. In the standard pond, we estimate to produce 4800 kg.
That means the total of 9600 of tilapia that are, 4800-5500 kilograms of
product. Note: The the adult tilapia fish weight is in between 1kg-4 kg. To achieve adulthood it requires 2-3 yr naturally.
Primary Cost: starting a small-scale business – Aquaculture tilapia farming
This
small-scale or bigger business depends on the production system. If it
is floating fish cultivation, it requires a lower investment. The cost
of the building calculates one hectare in a floating area. The
production capacity for 20 tons of Tilapia the cost per year corresponds
to 5 thousand dollars.
Look:
A floating cage for
continental water conditions of 20 meters in diameter. Three in-depth
has a cost of 4 thousand dollars. It produces 60 tons of biomass per
year. That the distribution of the cost as follows: 55% for a balanced
feed, 8% for fingerlings and 37% for production and administrative
costs.
Homemade organic tilapia feed:
To
grow tilapia fish you either buy feeds from the local market or made
feeds in your house. As they eat frequently everything. Homemade pellets
are one of the best for feeding. It made with Rice Bran, Corn, Oat
Groats, Canola Meal, Alfalfa Meal, or Linseed Meal, along with
vegetables.
You can give those feed directly in your tank. It
will damage the water very quickly. So we suggest buying feeds for
tilapia until they are 4 months old.
Feeding methods Of Small Tilapia Fish Farm
The
average survival of the fish determined in 99%. The growth of tilapia
fish around 960 grams per organism. To achieve this result, the
researchers modified the way of feeding the organisms. The amount of
food determined by the percentage of biomass.
Our recommendation
is giving a balanced feed to the fish. This should be floating composed.
It is mainly of flours of vegetable origin. It can be soy, corn and
wheat-soybean oil and fish, vitamins and minerals. This is the deal:
As
the fish increase in size, the level of protein in the food decreases.
This is going from 38% for small fish, to 24% for commercial size fish.
For
an entrepreneur, the best seasons of harvest and Commercialize are Lent
and Holy Week. Aquaculture production should increase by 40% by 2030.
The innovations in genetic improvement outlined. In this workshop is an
important step towards achieving these ambitious objectives.
Make Appropriate Food ratio
There
are several types of balanced foods. That used during the cultivation.
The initiating food is the most expensive. It is close to 20 pesos per
kilo. The rest of the food consumed costs around 10 pesos. Therefore,
the average price during the whole tilapia is 12.50. Another cost is
that of the animal, depending on the laboratories. That sell them it can
vary from 60 to 75 cents per fish.
Estimated feed required:
The most important matter to grow tilapia fish is the balanced feed.
It estimated that about 1.7 kilograms of food produce a kilogram of
meat. For every hundred tilapia it needs 170kg feed. It theoretically,
standard 100 fish weight is about 50-55kg.
The proper Types of cultivation methods:
Every
producer should consider the basic principles of aquaculture quantity,
quality, and continuity of water. We will see what is required of water
to use in each pond. Know if all time you have the same quantity and
quality in the water. Once you say with the quantity is with the
continuity of the water. You can proceed to install your hatchery.
There
are five ways to grow tilapia: extensive, semi-intensive, intensive,
hyper-intensive and industrial. There is profitability is in intensive
and hyperactive intensive crops. The difference between these two
systems one made in a land pond. Above all the other is in a pond of
material.
Intensive cultivation
The
intensive, the biologist mentions that with a pond on land. There have
to be at least four pounds of approximately 20 meters by 40. This shape
is with rectangular to grow tilapia fish. Another key point each one
should have a slope. The floor should have a slope with an entrance and
an exit separately. Stresses in this type of crop can handle 10 to 15
animals per cubic meter. It is to have the generalities mentioned.
Intensive Hyperactive Cultivation
The
second method profitably is the hyperactive intensive. Here the ponds
are circular. The system consists of a circular pond with a conical
bottom. The ponds have a drain in the center. You should prepare ponds
properly. Commercially there are four sizes of ponds.
The ideal is
that which has 9.40 meters in diameter. It holds about 80 cubic meters
of water. These ponds cost between $ 1200 and $1300.
Monitoring Procedure:
A
great advantage is in the two profitable breeding systems. That is only
one person needed to manage them. It requires monitoring the
temperature, oxygen levels.
This essential to concentration levels of ammonia in the system. There are commercial companies that sell this basic equipment.
And
if we want to recover the contained nutrients. You can execute in the
hydroponic culture. And, this phase of the research we have just
started.
Most Production of tilapia:
The
majority of Tilapia production is concentrated in the Colombia Dam.
This is a department of Huila. Their production reaches 35,000 tons per
year.
The second order is the Villavicencio area. The rest of the
production atomized in the other regions of the country. It corresponds
to the first marine species grow in Colombia.
This crop made in
floating cages in the open sea. It expected to harvest about 400 tons
this year. Export fresh to the United States market.
Mono sex Tilapia Fish farming method:
Monosex
tilapia fish farming is a method of only growing tilapia male fish.
Female fish are reproductive. They give birth about 200 – 1,000
fingerlings and in every 4-5 weeks. Which take more than 6 months to
become mature.
But the pain in the back is? If you have 100 female
it will give birth to 2000-10000 fingerlings. You literally dump! The
solution of that is Monosex tilapia fish.
Method of cultivation of Mono sex tilapia:
Mono sex Tilapia is cultivated in two stages. nursery and reservoir pond. It is
possible to get more production from the same pond in less time.
The food and caring method are like above. You just farming only male fishes.
Catching / Harvesting [ How & When]
Tips to grow tilapia fish faster and improve productivity:
When
the fish reach 180 or 200 grams. Divide the fish into different
pounds. In this time, the fish will require more space to move.
You can repeat the same process when they are about 300 grams. In the end, to grow tilapia you will need eight ponds.
A diet adjustment is needed after two of those above steps. This is crucial for improving productivity.
When they gain weight about 400g put them into the separate tanks.
Catching fish for sale:
If you grow tilapia fish, you will notices that they grow very first. That’s why raising them is profitable.
Catching them for sale starts when they become 400g.
But we recommend Harvesting them when they become 500g. Because people found it more profitable.
These Documents contain information gathered from many Online
Communities and all possible references have been given to the authors
of each individual article.
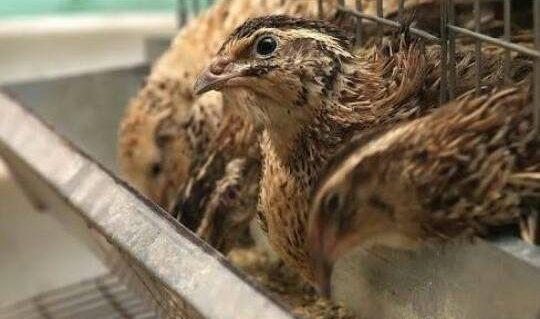
Quail farming business
is economically very profitable. Plus, you can grow this birds in your
home. Let’s know how to start your quail farm from the ground.
How to Start Quail Farming:
Step by step guide for starting your quail poultry farm for meat and eggs.
Start Quail Farming.The steps to start your farm will be like this. Note, this will be covered in this article. You can navigate between them by clicking any topics on the table of contents above. Quails are
well-known as a miniature bird in the world. The advantage of
cultivating this birds at home is very easy for beginners because it is
the smallest variety of domestic birds. In addition, This not only makes
why starting this farm at any home is very easy but also profitable
than the other poultry farm.
Steps to Start a Quail in Your Backyard:
Primary Steps- Information: This is the thing you have to learn before starting quail farming.
First, gather Information about this birds,
Learn about the environment in which they grow- the appropriate Temperature, light, and humidity for rearing,
Information about different rearing methods.
Comparison of the best varieties and their advantages.
And Then choose a variety and a rearing method depending on your varieties.
Second Steps- Setting up: In
this step, you have to build a shade for rearing this mini poultry
birds. There are thee completely different types of housing. So, build
the adequate shade depending on rearing method. Here I explain about:-
Different shade types,
How to build the house (in the rearing cage), required materials for the farm,
Next, choose your favored farming method, and select the best species and collecting them.
And Buy essential farm equipment.
Third Step- Rearing and Caring: Here, I will share tips about:-
The general caring methods.
What and how to feed this birds, and daily required feed & nutrition chart.
How to maintain a healthy growing environment in your Farm.
Egg laying case information & building tips.
You will also learn about the reproduction and the caring process of newly born.
Fourth Step:- Baby Quail Care
How to take care of newly borns.
Tips for building an artificial brooder.
How to move newborn birds into the brooder.
Fifth Step – Advance Care For Commercial Quail farm: This
step is very important for a commercial farm. Here you will learn about
the advance caring tips. This is so important, from my experience it
can be said that “In case if you don’t perform this, you will be in a lot of troubles.” This will cover:
Egg laying nest, and Brodder case building information,
Biosecurity,
How to make organic germicide,
And the advance care methods to increase productivity.
Finally- Creating a Business Plan: In this section, I will discuss the marketing plan, cost, and profit.
Quail Farming Information:
Its
native residence was in Japan. For the first time, Japanese scientists
have invented the way to adopt Quail as a domestic bird. Later,
in other countries of the world including the USA, Canada, Kania,
Zimbabwe, India, and Japan has been identified as a profitable poultry
grazing.
Quail Farming in BackyardYou
may already know that it is probably the smallest species among the
different poultry birds. However, growing them in your house backyard
are much like pigeons but do not require such a specific housing. And
there is no need for a large farmhouse like chicken. So you can grow
them in a room, which has direct access to air and sunlight. These
birds are well-known as a miniature bird in the world. The advantage of
cultivating this birds at home is very large because it is the smallest
variety of domestic birds. And, that is one of the reasons why starting
a farm at home is extremely easy.
Benefits of Quail farming:
There are many benefits of modern days quail farming, for example-
It can be raised easily in small areas or room at home because they are a very tiny creature.
Plus, The cost of food and shelter is very low, and they don’t require dedicated farmhouses.
Very low initial start-up cost, anyone can start a business with a small amount of capital.
But, they become mature in a very short time. Here, This growing process is so fast, actually in just 5 – 8 weeks.
Furthermore, a single female birds 150 – 300 egg in a year.
Also, the meat and eggs are very healthy and tasty.
Plus, Compared to chicken, the body weight proportionately is higher.
And the meat has less fat than the chicken meat.
Hence, they are immune to the disease, also the survival rate is higher than chicken.
This is the main reasons why rising quails is becoming very popular worldwide.
Suitable Temperature, Light, and Humidity for Rising Quails:
Temperature: The suitable temperature of the backyard quail farming is 21 to 32 Celsius (69.8 ° – 89.6 ° Fahrenheit). But
depending on varieties they may sufferer from heat stress at a
different temperature. We found that our birds feel comfortable in
between 22-25 Celsius. Light: Quails egg production is very dependent on light. Hence, to get enough number of eggs.
There should be 16 hours daily lighting (including daylight) from the ninth week to the quail bird farm.
Light is the very important thing for any farm. Why?
The newly born baby birds do not survive in cold temperature.
So,
every time you collect them to reproduce them, you need to ensure
temperature using light in a separate case called Brooder.
Now, Light can achieve by using electric bulbs and sunlight.
Ensure 13 hours light till they become seventh weeks older.
And increase the lighting time gradually from the seven weeks.
Eventually, increase the lighting by one hour for every week.
Which means you have to provide one extra hour lighting.
And, this process will continue until the total lighting time/a day is 15-16 hours.
More importantly, to produce maximum numbers of egg, they will need 16 hours of light when they are about 9 weeks of old.
Note that: With
a 40-watt bulb, 10.0 square centimeter of space can be illuminated. And
we found that the egg production increases in red color light compared
to blue color. Moisture: This bird can easily adapt to 40-70% relative humidity. However, the relative humidity of the house is 55-60% good. If
the relative humidity is higher then their feather will be moist,
respiratory problems and increase the chance of fungus. If the relative
humidity is less then their feathers will become rough.
Choose The Best Rearing Method:
There are three different rearing methods. Choose the best one depending on local demand.
According
to the purpose, commercial poultry farming can be divided into three
groups. Now learn more about each rearing system. And next, build the
adequate habitat or cages depending on the raring procedure.
Layer Quails Farm:
In a layer quail poultry farm, This birds are usually raised for 54-weeks.
Layer Quail FarmLayer Coil Farm is dedicated to egg production. Usually, Japanese Quail from the age of 6-7 weeks and the bobwhite quail at the age of 8-10 weeks start laying eggs. If the management is accurate, then every Japanese quail lay yearly 250-300 and bobwhite birds lay 150-200 eggs.
Broiler Quails Farm:
Broiler farm is dedicated to meat production.
If
you want to produce the soft and delicious meat, the broiler is raised
in this procedure. These species are little bigger then layer birds and
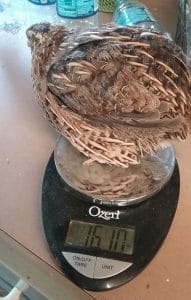
gain maximum weight quickly. Although they are dedicated to meat production the average egg production of broiler bird raising is about 150-250 in a year. But, Farmers do not rise them for that long period of time. average Northern Bobwhite is weighed in at about 170 grams. But Jumbo Coturnix species gains 450 to 460 grams at their adulthood.
Breeding Quails Farm:
This breeder quail lays egg and give birth to new babies. Farms for up to 30 weeks of its age.
Breeding Quails CageThe
breeding birds used to produce eggs for the production of new babies.
The general purpose of this method of grazing is to sell. Some varieties
are extremely beautiful. People always like to buy to rear commonly. Typically it takes 7-8 weeks forJapanese quail and 10-weeks bobwhite quail. And the small varieties like Button Quail are a perfect choice. The ratio of male and female should be kept in pairs (1: 1) on your farm.
Best Quails Varieties:
Though, this farming is not spread all over the world yet. They have some awesome varieties.
The
best varieties for start ranching form beginning are given below.
There are more than 140 kinds of them. Here are the most popular and
profitable breeds. Beside them, there are numbers of other species. depending on your need you can farm one or more.
Species Name
Identification
Time to Mature
Weight (At Adulthood)
Eggs Per Year
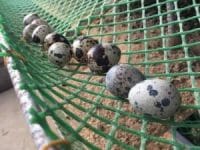
Japanese quail
Length Range: 17-19 cm Size: Small (5 – 9 in) Color Primary: Brown
5-6 weeks
90 g
250-300
Northern Bobwhite
Medium, morphologically variable birds.
8-10 Weeks
179 g
150-200
Jumbo Coturnix
The bigger selectively bred Coturnix plus are commonly adopt for meat.
6-7 weeks
450 g
150-220
The Texas A&M
Heavily Muscled Coturnix
6-7 weeks
370 g
150-200(App.)
Button Quail
Button Quail are small breeder birds.
5 weeks
130 g
100-120
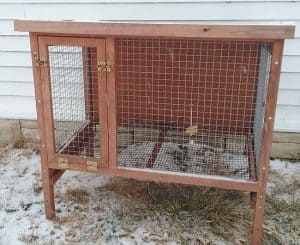
How to Create Habitat [Quails Cage]:
Low-Cost Quail Growing CageThe size of cages is somewhat different for different from each other. Learn how to build the best habitat for your birds. Here
we will describe the starter cage size and measurement. There are
another two types of cages used in commercial quail housekeeping. We
will describe them in the relevant sections. In order to build a house, the following points should be kept in mind.
Ensure a comfortable environment for birds.
Ensure natural light-air and keep it under control as needed.
Ability to protect the birds from excessive winter, hot or rain and damp conditions.
Construction of houses in a specific distance and required size.
Construct different rooms for different ages of quails.
In order to avoid any bad smell due to the bird’s stomach and urine, it is necessary to take proper action beforehand.
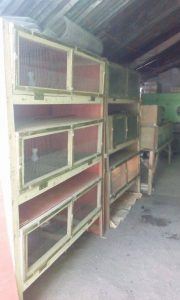
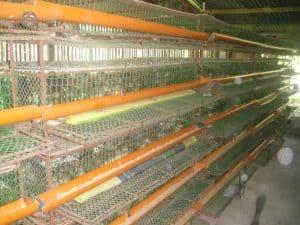
Appropriate Cages for Layer Quail raising:
Each cage is about 6 ft. long and 1 ft. wide and divided into 6 parts.Cages for Layer Quail raising
For utilizing the space, you can build up to 6-story cages. Also, keep at least 8- 10 cm distance between two stories.
And use moveable wooden parts at the lower part to separate them, so that the birds can be cleaned.
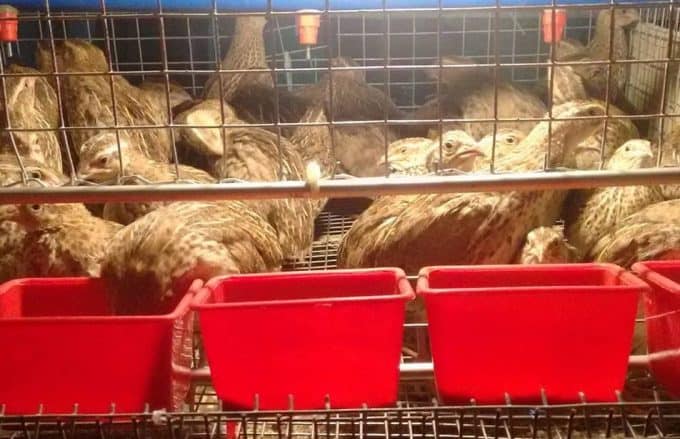
Place a long narrow water pot is in front of the cage.
Typically, 10-12 birds are fed in each cage in a cage by commercially producing eggs.
For the breeding, 1 male and 3 female quails are kept in this cage.
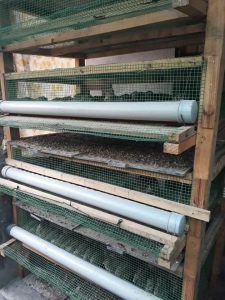
Appropriate Cages for Broiler Quail Raising:
About 6 birds can be raised in every square foot.
Cages for Broiler Quail raisingFor broiler quails farming method your
goal of rearing birds is to sell them as the poultry meat. That is why
to gain weight the bird needs to be kept in a smaller space.
After 2 weeks, Quails can be kept in the cage for rearing.
It helps to increase physical weight, because of this it is possible to avoid unnecessary roaming of birds.
Age
Cage Size
Number of Birds
2 Weeks
3 x 2.5 x 1.5 ft.
100
3-6 weeks
4 x 2.5 x 1.5 ft.
50
How To Build A Laying Nest:
The primary function of a laying nest is providing isolutation for egg laying quails.
EGG Laying NestEgg Laying house (egg-laying shade) built separately for each or shared for multiple birds. Note: Each bird will need approximate 15 cm personal space in an egg-laying nest.
Now, to build a private laying nest, and you can use a 15cm Wide, 20cm deep boxes.
And in case of the shared nest for 25-30 birds, use 1m wide, 20cm deep boxes.
This is important,
Separate
egg laying nest is important in a commercial poultry farming setup. It
will prevent them to destroy eggs. Also, egg-laying birds require extra
care.
Guideline for Collecting Quails:
The ultimate checklist before and after for buying quality quails.
Clean the shade, properly. Check every component especially the electronics parts.
And, buy the best quality quails, from an established farmer.
If you collect 2/3 days babies, You need to store them in the brooder for one or two additional days.
After that, Place them into rearing shade.
Essential Equipment and Materials for The farm:
There are a number of tools and materials required to handle this organic farms, as follows:
1. Brooder Hover,
2. Heater / Stove,
3. Plastic Tick Feed Tray,
4. Food pots,
5. Water pots,
6. Egg laying boxes,
7. Electric bulbs,
8. Defaults or balances for taking weight measurements,
9. Buckets, a shovel, spade, bowls, a knife, baskets, peal, tulle etc.
10. Egg laying house. Here, this is the boxes for constructing egg laying cage.
11. Bamboo, wood, corrugated, polythene or triple.
12. Thermometer, hypermeter and,
13. Battery or Brooder.
The following are some of the important tools and materials described below Feeder:
There will be a high-quality food serving dish;
(A) It can easily be filled with foods.
(B) And, easily cleanable. Water or drunker:
Whether the cage or liters are performed in the same manner, the characteristics of a potter’s water pot are as follows:
(A) Birds will get clean water supply from it.
(B) It will be easy for drinking water.
(C) Cleaning will be easy.
(D) Durable and cheaper in price.
Farm management: General Caring methods of Quails
To get adequate production from the quail farming, each farmer must study the details of farm management.
Even
a minor negligence or defects is enough for the failure of farms. So,
farmers please become extra careful when the following points. Pain or Stress Removal: Remember this as a result of stress, the production decreases severely and sometimes it can result in even death.
To
get a good production from your farm, ensure the certainly comfortable
environment that they will cherish. I have discussed this later in this
article. Food and water management: The food and
water management need be correct. If they have adequate food and water
for each bird, they will relish the food and water. Egg collection: Collect eggs at least two times a day. In the typical evening at 6: 00-6: 30 and the second night at 9.00 – 9.30. Egg Storing: It
must be stored immediately after the collection of eggs. Reserve
temperature and relative humidity are 12.8 ° -15.5 ° C, respectively.
(55.0 ° – 59.9 ° F) and 75-80%. Sexing: After the
deletion of a hatchery from the eggs produced by a family or
commercially managed farm, it is necessary to have sex or sexual
intercourse as soon as possible. Lip cutting or debeaking: Debeaking is an important factor in quail farm management. Debugging is to remove a certain part of the lip and nails.
Common Diseases:
One
of the benefits of quail celebration is that they are less affected by
disease than poultry. But, We are not saying that there are no diseases
at all.
They do not have to vaccinate for any disease. The reason behind is, they do not have fatal infections.
Most
common diseases of chicken can affect this minatuar birds. They can be
affected by viruses, bacteria, fungus, microplasma, parasites,
malnutrition, management defects, and conceptive problems can lead to
various diseases.
General Feeding Process for Rising:
Feed them three times a daily, such as 6am, 12-1pm and 7pm
General Feeding Process in an Organic Quail Farm:Like
other poultry, daily food must contain six nutrients, such as water,
carbohydrates, lipids, proteins, vitamins, and minerals.
All the
nutrients require to be supplied for the maximum amount of production
from the quail farming. Now, learn what to feed and what not feed.
They are very small, so you have to provide powdered foods.
Moreover, clean all food and water pots using organic germicide.
Ensure sufficient Water and food for each bird.
Remember, at the age of 5 weeks, quails eat about 500 grams of food,
6 months old quails eat 30-35 grams of food every day and,
For laying 12 eggs, they need around 400 grams of food.
Make a balanced diet rich with required nutrients.
For any reason, don’t supply fungus affected feeds
Don’t supply dried fish, mussels, wheat.
And don’t provide, until they completely finished the last meal.
How and What to Feed Depending on Age:
Use this chart to make 5 kg of starter mash using oil to feed 75 time.
On average, every adult bird needs only 8 kg of food per year. You have to provide the exact amount of feeds for them.
To determine, daily required foods for quail farming multiply the feeds weight with the number of birds. This chart demonstrates daily needs for a single bird.
Organic Feed Ingredients
Child Mash (0-3 weeks)
Adult mash
Corn
27 g
31 g
Sorghum
15 g
14 g
Chill without oil
8 g
8 g
Wood nutcakes
17 g
17 g
Sunflower cake
12.5 g
12.5
Soya meals
8 g
–
Fish meal
10 g
20 g
Mineral mix
2.5 g
2.5g
Bite particle
–
5 g
How to Ensure Maximum Productivity:
To get the desired product from the farm, you should take care of the following factors.
Collecting healthy birds.
Always buy the baby birds from a well-established hatchery.
From the 1st day of birth, ensure the right temperature, light, food, and water for them in the brooder.
The regular productivity-raising formula for layers is: “Provide of pure water and daily 13-16 hours of light.”
Plus, provide adequate air circulation in the bird’s house.
Always keep the houses and cages clean and clean.
And please do not disturb them by any means.
Bedding Materials: Litter and It’s Management Procedure
In one word, the bed that is used in the quail bards room to make the accommodation comfortable is called litter.
Though,
building a comfortable bedding is not costly. However, it is very
sensitive, which normally affect the production directly.
First, I will provide a guideline to make a bed then it’s proper management process.
How to Create Litter for Quails:
In the beginning, spread 5 cm thick litter material on a clean floor.
Then gradually add more litter material, and increase the thickness to 10 cm in 4-5 weeks.
In the case of brooder foster child, before placing quails put 10 cm thick litter.
Materials for Creating Litter Bed:
Generally, as a litter Rice husk, Wood powder, Paddy or wheat dry, Straw, Wood Stove, Nuts powder Etc. are used.
Bactericide and its use:
The
role of disinfectant is very important in protecting the health of the
harmful and sterile environment in the growth of the quail residence.
Various
experiments have shown that no bactericide is functioning alone. So,
anyone who uses antibiotics such as heat (sunlight),
coal-tas-derivatives, chlorine, formaldehyde, copper sulfate etc. should
be used.
Reproducing Baby Quails:
500 female can gives birth to 1500-2000 quails.
At the age of 7-9th week, they started laying eggs. In that time, normally 60-70% female quail lay eggs.
For the laying eggs, keep the male and female quails together at 8-10 weeks of age male. And maintain a ratio of male birds: female birds at the of 1: 5. That means, for every male, there will be five female.
They generally occupy 18 days on eggs in hatching and give birth to baby quails.
Newborn babies are extremely weak and vulnerable to diseases. So, you have to ensure a healthier hatching case. To ensure the healthier environment in a hatching,spray
good and effective bacterial spray immediately after scattering fresh
litter material. However, perform this 2-3 day before moving the child
into the brooder.
Re-production Time Caring Tips:
If there is a lack of vitamins and mineral, then the newborn quail’s leg can be lean and weak. so ensure vitamins and minerals.
Male birds some time quarrel with them. So, do not take it lightly because female birds are much weaker at that stage.
And, feed them separately. Moreover, always keep on eye on them when they are hatching.
Raising Baby Quail:
Generally, the weight of baby quails is about 8-10g. As a result, they require more warmth. but,
The lack of adequate warmth and intense cold gathering kids gather in one place, leading toward increased mortality.
And, always protect them from the rats and other harmful animals.
How to Made The Brooder For Baby Quails:
One-day-old children are usually raised in to of a brooder. That ensure the right temperature, light for them.
brooderThe
brooder has a heat source, such as an electric heater, electric bulb,
kerosene lamp, chaff-wood or coal lamp, light lamps or infrared bulb.
But infrared bulbs are the most scientific.
Generally, the broader has a shade that is known as Hover.
However, It can be square, rectangular, hexagonal or round.
And the broader hover can build with GI pips, bamboo or wood.
Now
Inside,
the brooder builds a 15cm round fence, so that the kids can properly
take food and water inside the brooder and stay in one place.
This circular ring called Chik Guard. It can be made with tin, tea, hardboard or thick paper.
Brooding principles:
All kinds of brooding make for layers or broiler are similar. During breeding, be aware of the following. For example,
Maintain the right temperature,
Ensuring enough light,
Ventilation system.
Baby quail density (number)/ area.
Food and water management.
Healthy environment etc.
Artificial Brooding Equipment:
In order to make an artificial brooding. If you and want to make brooder the following machines will be required.
Browder or baby tempering device,
Chick guard/brooder or baby diversion,
Broom furnace or heater,
Hover,
Liter or bed,
Thermometer,
Hygrometer and,
Food and water pot.
Considerations for Child Transfers:
If
it demands more than three hours for the transferal, then mix glucose
with some melon or boiling green pepper pieces. And spread it in the
box. That will protect the child from the water disorders.
Transport must be cleaned properly and inside of the bacteria.
Boxes cannot be higher than three levels.
In the two layers of the box, 10 cm The distance should be maintained.
And, assure enough clean air for the child.
Quail Farming Business Plan:
Now, after starting a quail farm for commercial purposes the next thing you have to carate is the business plan. However,
if you follow all the steps we mentioned here, we will start an organic
farm. Because it is too easy to maintain this farm organically and
there is no other alternative. There
are several benefits of producing an organic product. In this
cultivation, it opens a broad area of consumer affection. So there will
be noticeable demand in your locality. So, create an appropriate business plan and keep this points when creating a policy.
How and Where to sell, Which varieties have more demand?
Then, How much to grow?
Do you want eggs or meats? or both?
Competitors Analysis.
But
you know every local or small-scale business involves some common
difficulties. The challenge for you will be Marketing. Let’s determine
that in the marketing plan for quail farming.
Marketing Plan for Quail Farming Business:
Retailing
is a very critical part of a wealthy quail bird farming business. So,
the first step you need to make is finding out the demand in the
marketplace. Generally, the eggs have more demand then meats.
Does organic food has special interest among the people?
Do there is any demand?
First, Try to determine the demands of quail products in your local market.
Now, without concerning immeasurable marketing abilities, you will not be capable to make the most profit from your business.
Raising quail is easy,
Firstly,
This poultry birds are very cute and the eggs look different also
beautiful too. By the way when you are a newest farmer. You can asking
your relatives and friends for help. Social media is one other place to
hang on. Meet the people in your area. And, tell them the benefits of
eggs and meat by placing posters around your area. Note: Inform the people about your products and ask them to tell others.
Now,
you can also distribute leaflets. And, you don’t have to bother much
about marketing again when your farm will be popular. Here, This may
take time but do not skip this.
These Documents contain information gathered from many Online
Communities and all possible references have been given to the authors
of each individual article.
The one and
only super soil recipe, My
Grand Daddy Jack started his farm with Worms
Vermicast. - -EzE - Worm Vermicast
& Nutrients- -
has all the principle - to provide all of the nutrition needed to complete the
grow cycle and produce an awesome organic harvest.
Earthworms are more important than pandas (if you want to save the planet) But although they’re not most people’s idea of cute and cuddly, the
earthworm is the most important species on the planet when it comes to
the survival of humanity.
This is the best and I would
say the most popular recipes in circulation and is based on the original
super soil theory. PER -EzE. This recipe makes just over 14 cubic feet of soil
or enough for around (12-15) 5
gallon smart pots or nursery pots (remember, you are
only filling the containers about half full with the super soil mix) so you can
scale this up or down depending on how much you need:
Ingredients:
5 - 1.5 cubic ft bags of high-quality Organic top soil
Mix
all ingredients, moistening slightly until moist, not damp. Once
thoroughly mixed, transfer to several covered container(s), i.e.,
totes/garbage cans or simply cover with a tarp. Allow a minimum of 45
days, up to 90 days to ‘cook’ or composting time before use.
After
the mixture is properly composted, fill planting containers
approximately halfway with the super soil mix and add an inch or two of
the base mix on top. Transplant into the final nursery pot and finish
filling with base soil. From here, just amend with compost tea until
harvest.
If
this sounds like more than you’re willing to take on, but you still
want to give super soil a try, the good news is that EzE - Worm Vermicast & Nutrients- makes super soil mix available
These Documents contain information gathered from many Online
Communities and all possible references have been given to the authors
of each individual article.

 Advantages of aquaponics

 Now,
in a pond should be of 20 by 40 meters. The standard size is 800 square
meters. The depth that we are going to have is 1 meter 20 centimeters.
It represents 960 cubic meters of water.
Now,
in a pond should be of 20 by 40 meters. The standard size is 800 square
meters. The depth that we are going to have is 1 meter 20 centimeters.
It represents 960 cubic meters of water.