
Like cacti, succulents do best in dry conditions. When growing aloe vera plants, plant them in a cactus potting soil mix or a regular potting soil that has been amended with additional perlite or building sand. Also, make sure that the pot has plenty of drainage holes. Aloe vera plants cannot tolerate standing water.
Cacti are fairly easy to propagate from cuttings, but aloe vera cuttings, with their high moisture content, rarely become viable plants. Rooting an aloe vera plant leaf seems like it should work, but all you will get is a rotten or shriveled leaf. ... A better way to share this delightful plant is by removal of offsets
How to Start an Aloe Vera Plant Separating aloe pups, also known as aloe offsets or aloe offshoots, is a simple process that even a nervous home gardener can undertake with few tools and just a little knowledge. Aloe pups are essentially baby plants that share part of the root system of the parent plant, so all you need to do to start an aloe plant from a pup is to wait until it is big enough to remove from the mother plant. The removal size of the offset will depend on the variety of aloe. As a general rule, wait until the offset is at least one-fifth the size of the parent plant or has several sets of true leaves. Very old, large aloes can have their pups removed from them when they are small, but they must still have enough leaves (at least three) to produce their own plant sugars for survival. The pup must be mature enough for rooting an aloe vera plant successfully.

Steps for Separating Aloe Pups Once
the aloe pup is the right size, remove the dirt from around the base of the
pup. Examine the area and determine where would be the right place to cut to
remove the aloe pup. When the pup comes away from the mother aloe plant, it
should have a complete root system attached. Use a sharp, clean knife to cut
the aloe pup away from the mother plant. Clean tools are important for
separating aloe pups, in order to prevent contamination by disease and pests
and produce a clean surface that will mesh quickly with the planting medium.
Plant the newly removed pup in dry cacti potting mix or make your own with one
part potting soil and one part sand. Allow it to sit for one week, then water
the soil. After this, you can care for the aloe vera pup as you would a normal
aloe plant.
How to Divide Aloe Vera Pups
Once you’ve had your aloe plant for a few years, you will notice baby aloes growing at the base. The offsets will need to be at least four inches tall before you consider dividing them from the parent plant.This process is going to be a little messy, so you may want to do it outdoors or use a potting bench or tray to help control the soil. Slide the plant from the pot (you may need to use a trowel or hori hori knife to loosen the plant). Make sure to primarily handle the aloe by the root ball to avoid damaging the plant. Gently work the root ball with your hands to remove as much of the soil as possible.
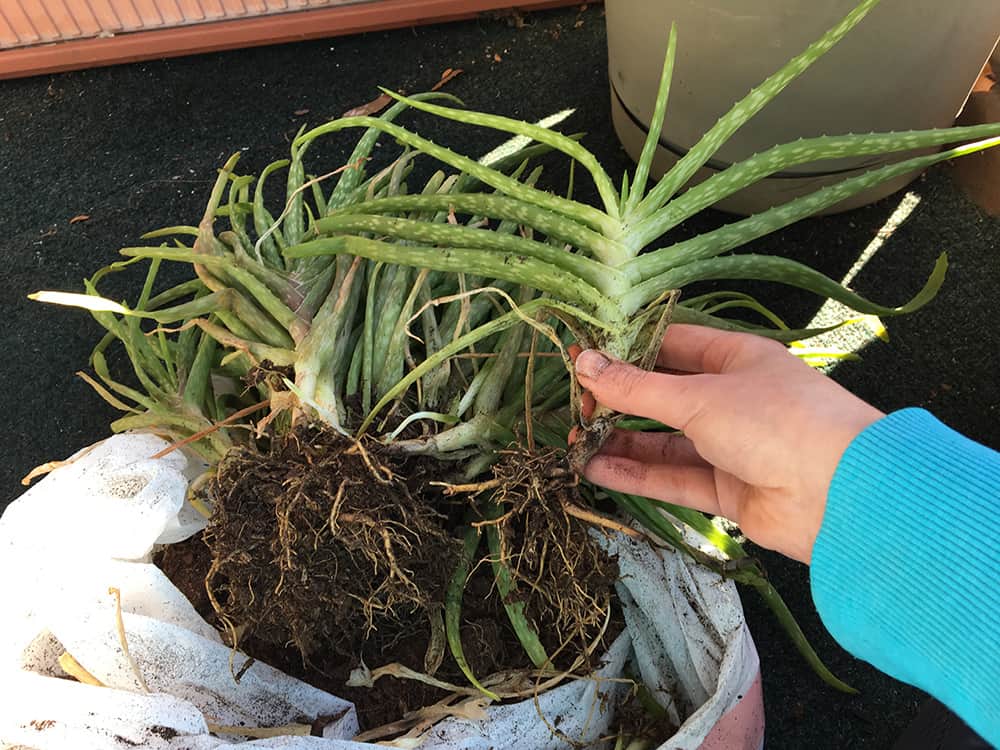
Some of the aloe pups may fall away during this process. Once you remove excess soil and any loose pups, examine the roots of your aloe plant. Isolate a baby and try to gently remove it from the parent. If it’s firmly attached, use a sharp clean knife (a non-serrated kitchen knife works great) and cut the pup off the parent. See the photos below that show where to cut.

Examine your aloe pups. As long as they have some roots attached, they will grow once replanted. Any offset without roots can be composted or used for its aloe gel.
Allow the parents and pups to “rest.” They need at least 24 hours (or up to six days) to allow their wounds to heal. The wounds will dry and callous over. Lay them out flat in a cool, dry, place away from direct sunlight.
How to Transplant Aloe Vera
Whether you’re transplanting your aloe whole into a larger pot or planting your new pups, it’s the same process. Aloe plants benefit from being repotted with fresh soil or compost every year or two.Select a pot or container with good drainage. For pups, plant them in a 4″ diameter pot.
For a growing medium, either buy a good cactus mix or you can take your own compost or a regular potting soil and mix it 2 parts soil and 1 part perlite to create a well-draining mix.
Add 1-2″ of soil to the pot and then gently place your aloe plant inside. If needed, add more soil to the bottom of the pot so the base of the plant aligns with the lip of the pot. Fill the pot with more soil up to the point on the plant that was under the soil originally.
Place your aloe plants in a sunny spot (they like a lot of sun!). Wait for three days before you water them and then only water again when the soil is dry.
Steps for Separating
Aloe Pups
Once the aloe pup is the right size, remove the dirt from around the
base of the pup. Examine the area and determine where would be the right
place to cut to remove the aloe pup. When the pup comes away from the
mother aloe plant, it should have a complete root system attached.
Use a sharp, clean knife to cut the aloe pup away from the mother plant.
Clean tools are important for separating aloe pups, in order to prevent
contamination by disease and pests and produce a clean surface that
will mesh quickly with the planting medium.
Plant the newly removed pup in dry cacti potting mix or make your own
with one part potting soil and one part sand. Allow it to sit for one
week, then water the soil. After this, you can care for the aloe vera
pup as you would a normal aloe plant.
Read more at Gardening Know How: Propagating Aloe Vera – Rooting Aloe Vera Cuttings Or Separating Aloe Pups https://www.gardeningknowhow.com/houseplants/aloe-vera/aloe-plant-propagation.htm
Read more at Gardening Know How: Propagating Aloe Vera – Rooting Aloe Vera Cuttings Or Separating Aloe Pups https://www.gardeningknowhow.com/houseplants/aloe-vera/aloe-plant-propagation.htm
How to Start an Aloe
Vera Plant
Separating aloe pups, also known as aloe offsets or aloe offshoots, is a
simple process that even a nervous home gardener can undertake with few
tools and just a little knowledge. Aloe pups are essentially baby
plants that share part of the root system of the parent plant, so all
you need to do to start an aloe plant from a pup is to wait until it is
big enough to remove from the mother plant.
The removal size of the offset will depend on the variety of aloe. As a
general rule, wait until the offset is at least one-fifth the size of
the parent plant or has several sets of true leaves.
Very old, large aloes can have their pups removed from them when they
are small, but they must still have enough leaves (at least three) to
produce their own plant sugars for survival. The pup must be mature
enough for rooting an aloe vera plant successfully.
Read more at Gardening Know How: Propagating Aloe Vera – Rooting Aloe Vera Cuttings Or Separating Aloe Pups https://www.gardeningknowhow.com/houseplants/aloe-vera/aloe-plant-propagation.htm
Read more at Gardening Know How: Propagating Aloe Vera – Rooting Aloe Vera Cuttings Or Separating Aloe Pups https://www.gardeningknowhow.com/houseplants/aloe-vera/aloe-plant-propagation.htm
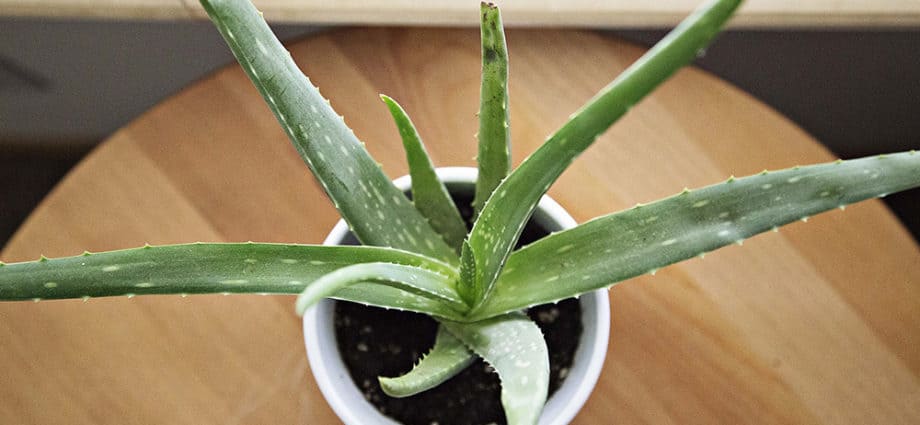
Aloe vera is a popular
houseplant with medicinal properties. The sap from leaves has wonderful
topical benefits, especially on burns. Their fabulous smooth, glossy,
plump foliage and ease of care make these houseplants ideal additions in
the home. Often, people want to share their aloe plants with friends
and wonder how to start an aloe plant. Let’s take a look at rooting an
aloe vera plant from a leaf cutting and separating aloe pups.
Read more at Gardening Know How: Propagating Aloe Vera – Rooting Aloe Vera Cuttings Or Separating Aloe Pups https://www.gardeningknowhow.com/houseplants/aloe-vera/aloe-plant-propagation.htm
Read more at Gardening Know How: Propagating Aloe Vera – Rooting Aloe Vera Cuttings Or Separating Aloe Pups https://www.gardeningknowhow.com/houseplants/aloe-vera/aloe-plant-propagation.htm
Aloe vera is a popular
houseplant with medicinal properties. The sap from leaves has wonderful
topical benefits, especially on burns. Their fabulous smooth, glossy,
plump foliage and ease of care make these houseplants ideal additions in
the home. Often, people want to share their aloe plants with friends
and wonder how to start an aloe plant. Let’s take a look at rooting an
aloe vera plant from a leaf cutting and separating aloe pups.
About Aloe Plant Propagation
Many people ask, “Can I grow an aloe plant from a leaf cutting?” You
can, but the most successful method of aloe plant propagation is from
offsets or “pups” with resulting plants almost immediately.
Aloe vera is a succulent and as such, is related to the cactus. Cacti
are fairly easy to propagate from cuttings, but aloe vera cuttings, with
their high moisture content, rarely become viable plants. Rooting an
aloe vera plant leaf seems like it should work, but all you will get is a
rotten or shriveled leaf.
As a result, aloe vera cuttings are not the most reliable method of
plant propagation.
Read more at Gardening Know How: Propagating Aloe Vera – Rooting Aloe Vera Cuttings Or Separating Aloe Pups https://www.gardeningknowhow.com/houseplants/aloe-vera/aloe-plant-propagation.htm
Read more at Gardening Know How: Propagating Aloe Vera – Rooting Aloe Vera Cuttings Or Separating Aloe Pups https://www.gardeningknowhow.com/houseplants/aloe-vera/aloe-plant-propagation.htm
How to Grow an Aloe
Plant
The first step in aloe vera plant care is to realize that this plant is a
succulent. Like cacti, succulents do best in dry conditions. When
growing aloe vera plants, plant them in a cactus potting soil mix or a
regular potting soil that has been amended with additional perlite or
building sand. Also, make sure that the pot has plenty of drainage
holes. Aloe vera plants cannot tolerate standing water.
One important thing in the care of aloe vera houseplants is that they
have proper light. Aloe vera plants need bright light, so they do best
in south- or west-facing windows.
Care of Aloe Houseplants
Another important part of how to grow an aloe plant is to water the
plant properly. The soil of the aloe vera plant should be allowed to go
completely dry before being watered. When the aloe plant is watered, the
soil should be thoroughly drenched, but the water should be allowed to
drain freely from the soil. The most common reason an aloe plant dies is
that the owners water too often or do not allow the water to drain. Do
Read more at Gardening Know How: Aloe Vera Plant Care – How To Grow An Aloe Plant https://www.gardeningknowhow.com/houseplants/aloe-vera/aloe-vera-plant-care.htm
Read more at Gardening Know How: Aloe Vera Plant Care – How To Grow An Aloe Plant https://www.gardeningknowhow.com/houseplants/aloe-vera/aloe-vera-plant-care.htm
How to Grow an Aloe
Plant
The first step in aloe vera plant care is to realize that this plant is a
succulent. Like cacti, succulents do best in dry conditions. When
growing aloe vera plants, plant them in a cactus potting soil mix or a
regular potting soil that has been amended with additional perlite or
building sand. Also, make sure that the pot has plenty of drainage
holes. Aloe vera plants cannot tolerate standing water.
One important thing in the care of aloe vera houseplants is that they
have proper light. Aloe vera plants need bright light, so they do best
in south- or west-facing windows.
Care of Aloe Houseplants
Another important part of how to grow an aloe plant is to water the
plant properly. The soil of the aloe vera plant should be allowed to go
completely dry before being watered. When the aloe plant is watered, the
soil should be thoroughly drenched, but the water should be allowed to
drain freely from the soil. The most
Read more at Gardening Know How: Aloe Vera Plant Care – How To Grow An Aloe Plant https://www.gardeningknowhow.com/houseplants/aloe-vera/aloe-vera-plant-care.htm
Read more at Gardening Know How: Aloe Vera Plant Care – How To Grow An Aloe Plant https://www.gardeningknowhow.com/houseplants/aloe-vera/aloe-vera-plant-care.htm


